Steps
To add a new Pipeline in ToolsonCloud Sales CRM, follow these steps:
- Login to your CRM account
- On the navbar, click on the profile icon at the top-right
corner.
- A drop down menu shall appear displaying multiple options.
Click on "Settings" option from the drop down menu.
- In settings page, you may find "Pipelines and Stages" link
under Admin Settings section.
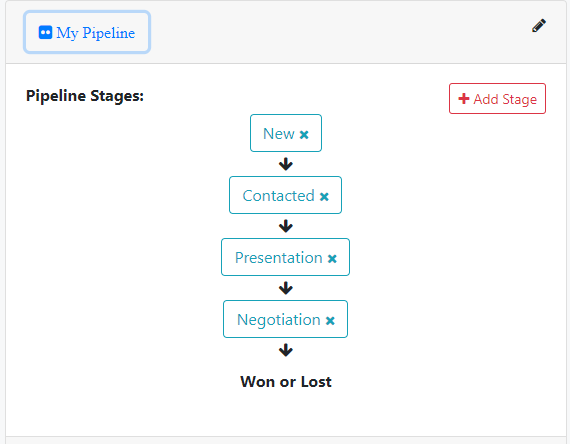
- Here you can find an already existing default pipeline
titled "My Pipeline" which was created when you created your
account for the first time.
- To add a new pipeline, click on "Add Pipeline" button at
the top right corner.
- A Dialog box would appear prompting you to enter the
pipeline name.
- Give a name for the pipeline and click on "Add Pipeline"
to save it. This will create a new one.
- To add or modify the stages of the pipeline, you can use
add stage button or the delete icon beside every stage.
Still having questions?
Contact us now