How to enable or disable a user in CRM?
When you have a number of users from of your organization using the CRM. You may require the need for enabling or disabling the user in the CRM application.
- If a user leaves your organization, you need to disable his/her user account to restrict them from accessing your CRM data.
- If a user left your sales team and joined another team within your organization, you had disabled the user in your CRM. Now after few months, he/she is returning back to your team due to team alignment. In that case you may be required to enable his account again so that the user can login to the CRM application and can work on the leads and deals.
- You want to scale up or scale down the CRM user seats which you want to buy at the time of CRM subscription renewal. Disabling the non-active user helps you save cost on their seats. Any left over seat in active subscription can be allotted to another active user. This gives you the ability to flexibly scale your CRM subscription costs.
Important Note
- Privilege: The option to enable or disable a user account in the CRM application is available only to Administrator account
- Once Admin disables a user account, the data created by the user in the past is not deleted. It is retained so that other team members using the CRM can still view and update the CRM records (based on their role privileges and permissions)
- If Admin disables a user, the concerned user's login will be disabled restricting his login to the application.
- If the Admin requires the user to be able to login again, they can enable it in the application. If the new user being enabled increases the count of number of active CRM users beyond the seats subscribed, you would be prompted to either disable another non-active user or to buy additional seat.
Steps
To enable or disable a user in Toolsoncloud CRM, follow these steps:
- Login to Toolsoncloud Sales CRM with your credentials.
- At the top right corner in navbar, click on the profile
button displaying your email id. You will be displayed a list of
options in drop down menu.

- Click on "Settings" option from the drop down menu displayed to you. You will be redirected to Settings page
- In the left side pane, you can find the link to "Users &
Roles" page. Click the link to navigate to Users and Role
management page.
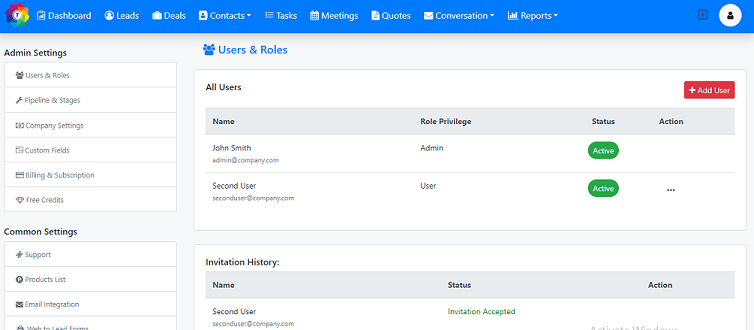
- In the table listing "All Users", you can locate
a three dot menu in the "Action" column. Click on the three dot menu to expand the dropdown.

- You should be able to locate the menu option titled "Active" or "Deactivate". You can click on this option to enable or disable a user.